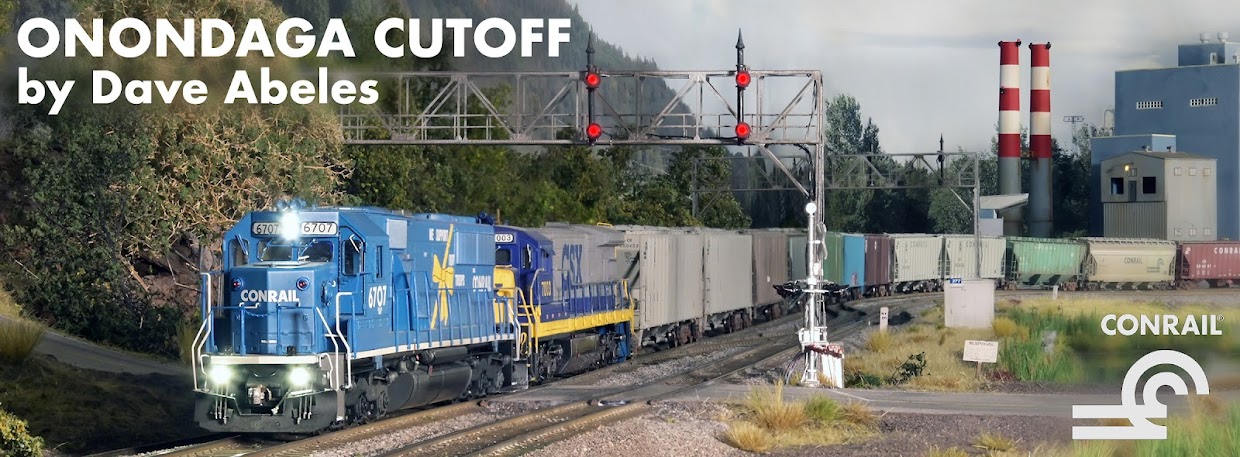
Tuesday, December 23, 2014

A Great Year's End

A year's end treat for you all:  On a cool, sunny morning in September 1994, the first SQ-555 westbound stack train moves across the Onondaga Cutoff on its way to interchange for the trip west to Chicago and Seattle.  This was the first meet between two NYS&W trains on the Cutoff, as SY-1 was ready to leave the yard on the left at the same time.  The sounds of a typical operating session are worth hearing, too - best heard with headphones or a sub-woofer!


Progress is continuing on the Island Extension yard, where Phase II of the project is moving along well.  All track is in place, and after a few tweaks this addition will really help capacity for 'offline' movements during operating sessions.  Next steps will be to drop feeder wires to each piece of rail, and add ground-throw switch machines for crews to use to throw turnouts.
Here's an overview of the new yard area with the final track curing under weights:

And a general view of the dispacher/trainmaster area with the new yard above:


As 2014 draws to a close, I want to thank each of you that reads this blog and let you all know how much I appreciate your enthusiasm and support.  I feel this is a hobby that celebrates community and you all are the community that brings this layout to life!   Best wishes to you all in the new year, and Merry Christmas, Happy Holidays to all!

~RGDave

Tuesday, December 9, 2014

Island Track Extension: Phase II

Despite holiday commitments and family events, I have found time to work on the assembly and installation of the next phase of the Island Track Extension Project, designed to alleviate capacity constraints on the Island Running Track, and therefore both ends of the Onondaga Cutoff.


I had the lumber for this project on-hand, and Jack & I had built a very sturdy support system for the Trainmaster-Dispatcher Station table, with a thought ahead that it may be used to support the Island Extension as well.  The TM/DS table is 3/4" plywood with a 2" X 3" frame, and that in turn is supported by 2" X 4" and 4" by 4" legs as pictured above.  The second level was again 3/4" plywood, and a simple support beam was attached before installation on the table.


Careful measurement of height was required to cut support legs of the proper length to allow a smooth transition to the Phase I construction.  The result is a new yard area that is just about level, with a gentle transition to the 1% grade of Phase I.


There was some concern on the part of regular operators that the new level will be restrictive for Trainmasters and Dispatchers, and as a result I was able to adjust the width and placement of the new level for the yard to maximize the available space on the desk below.  That said, it is important to maintain a 6-track design to allow for future storage of a unit coal train and an Amtrak consist, and all of that should be spaced widely to allow for personnel to access equipment by hand (the ol' '0-5-0 switcher) if needed.  So, I used a scale 18-foot clearance, center-to-center, making for 2.5" clearance in HO scale.


Here is a quick shot of all 6 tracks placed evenly across the new board to check clearances and give an idea of how this will look when it is all in place.  From left to right, we are looking at the approximate alignments of the tracks named as follows:  Layoff, Runaround, Ladder, Express, Island S&I track 1, Island S&I track 2.

Enjoy the holiday season - plenty more to come as this project comes together!

~RGDave

Sunday, November 30, 2014

Views of a Recent Operating Session

Happy Thanksgiving!  Thanks for taking time to check out the blog, hope you enjoy what you see!

Here's a few views of the recent November 22, 2014 operating session, during which we re-enacted September 10, 1994 on the railroad based on Conrail schedules and timetables.

First, an extra military train ran, carrying the symbol MIL-401.  Conrail gave the 'MIL' prefix to any dedicated military extra, and the digits worked with the division first ('4' for Albany Division origin) and the section of the train second ('01' for first such movement of the day).   So, the MIL-401 is a military extra originating on the Albany Division and is the first Albany Division military extra origin of the day.  In any case, here it is pausing at CP280, adjacent to Onondaga Yard:


Shortly thereafter, I grabbed a quick shot with my iPhone of the view looking west from CP280, which has in the distant background some of the new scenery along the M&E.   For now, this is the most 'complete' view along the Onondaga Cutoff, and helps give a sense of space in the layout room.


I am also in the process of editing a video or two of this operating session to present here in the next entry.

With this most recent operating session behind us, things will quiet down a bit on the model railroad between the holiday season and the pending arrival of another baby - the Abeles family is about to have a new member!   I will do my best during the next few weeks and months to keep you up to date with all the changes.  I hope to still find a few moments to make some progress on the railroad.

Happy Holidays!
~RGDave

Monday, November 17, 2014

The 'Canyon' at Skaneateles Creek

As scenery continues to develop on the Onondaga Cutoff, I am focused on getting the areas that visitors see first taken care of.  A major part of that has recently been finished, with the bridge on the M&E at Skaneateles Creek now finally crossing finished cliffs!   Here's a few images that show the newly-installed cliffs and vegetation.'

The new scenery really helps to focus attention on the open-deck bridge, which until now crossed a bunch of pink foam and plywood.


Birch trees, after a long hot summer, have started to turn to their fall colors a bit early.  These splashes of color really help to add some interest to the overall scene.


All that remains is to add a few more trees and foliage to better transition the backdrop, and then to add water to the creek bed along with some final details.  There's a variety of scenery techniques here:  plaster-embedded cloth over cardboard strips, foamboard insulation, various ground foams and polyfiber fabric, 'SuperTrees', static grass, etc.  My feeling is that using a variety of techniques and colors for foliage really leads an authenticity to the scene.

Scenery will continue into the winter, and will be mixed with time spent tweaking the signal system as well as work to add a few more locomotives to the active roster.  This is a great hobby:  so many different things to do, with such tangible and visible progress!  I haven't been bored in years.  It's a great relief from the daily grind at work.

Plenty more to come!  And, after several scenery posts, some more pics of actual trains are in order, too.  Stay tuned!

~RGDave

Tuesday, October 28, 2014

Finally, Real Foliage

It's a bit ironic that as we enjoy the beautiful colors of fall outside my home in western New Jersey I am finally learning to add foliage to my layout.  Thanks to a neat product called 'Super Trees' by a company called Scenic Express, I am learning to build my own trees so that no two are exactly alike, and am able to do that in about 2 minutes a tree, at a cost of about 50 cents a tree (!!).

How do they look?

I am really excited about how they appear, both individually and even more so in a group.  The first piece of the layout to get more trees is the M&E.  While the above group is all the new trees, the one below includes a few of mine mixed in with some commercial trees I had installed previously.


At this rate, I am very excited about the future of the appearance of the scenery for the railroad.  The challenge now is to find time to do it, mixed in with mechanical projects, real-life commitments, and a new future extension project - extending the Island Running Track to allow for more flexibility during operating sessions!  This winter promises to be full of potential on the Onondaga Cutoff.

~RGDave

Wednesday, October 15, 2014

Adventure on the Montana Rail Link

A temporary hiatus of progress on the OC, and thus a lack of blog updates, is the direct result of limited time.  But, this time, that is due to a generous donation of effort by my wife to cover the home front so that I could make a trip to see the Montana Rail Link, which has long been on my list of railroads to visit in depth.  While having passed through MRL country in 2003, this was the first time I could do it properly.


It was an epic trip, one that exceeded all my expectations; THIS is a modern railroad to be excited about!  While we did get to see the SD45 show, and while it was a highlight, the pride and focus of the operation promises a bright future, and the modern SD70ACe power isn't going anywhere soon - and it it has a sound all its own.

The rest of the photos are available for viewing at https://www.flickr.com/photos/77452817@N08/

More modeling will be coming soon, but I figured I'd put a note up here to document time well spent watching trains in Montana in September/October 2014!

~RGDave

Friday, September 12, 2014

Trackside on the OC

Even on a busy railroad, there's down time waiting for things to move.  And so we take photos of what we can, of things we find visually interesting.

MP 281 on Conrail's Chicago Line, adjacent to Onondaga Yard, sits in the afternoon sun, marked by a classic New York Central concrete milepost, denoting this spot as 281.0 miles from the end of track at Grand Central Terminal in New York City.

Over at Euclid Yard, cars for M&E's afternoon outbound train to Onondaga sit and wait for a few more switching moves.  Maintenance crews use the route of a former track, now a rough dirt road adjacent to the tracks, for vehicular access to the trains.  


Scenery makes the hobby much more enjoyable, and lets our imaginations wander from 'how should this look?' to a new dimension of 'what is happening here?'  We go from imagining visual images to imagining the entire operation, which is far more interesting!

The next big challenge for making scenery is building trees - stay tuned for how that works out!

~RGDave

Sunday, August 31, 2014

A Bit More Scenery

I am working lately to continue to develop techniques for scenery, among a busy summer of family activities!  I'm also playing with photo angles and lighting in advance of finalizing scenery - it's amazing how much tighter angles get when suddenly there are 'big' trees that suddenly spring up.  On the M&E, modeling a Central New York forest scene was always the plan, so that's where I am starting scenery in earnest.   Here's a photo presented in 'black & white' that shows the recent progress.  Compare this to photos from the last few months!


This weekend will allow for some additional 'field time' to take a look at prototype scenes in Central New York - can't get enough of that.   Happy Labor Day to all!

~RGDave 

Sunday, August 24, 2014

Scenery Musings

As the summer draws to a close - hard to believe - I have been able to spend more time on scenery.  Note that spending time on scenery, at least at this early stage, does not mean spending time building scenery!  Much time goes into trying ideas and into dreaming up how a scene should look.  I am using a small part of the M&E mainline near Skaneateles Creek to test some ideas for scenery construction and materials, and so far, the results have been educational, with some being good enough to be used systemwide.


Looking railroad-North along the right-of-way, we have a quick grab-shot from the iPhone allowing us to see some of my newly-modeled cliffs, including overgrowth, and some lineside vegetation.  I am going to take my time with overall scenery so as to make sure it has the effect it should - deception.  I still have a ways to go.  The track here is a work-in-progress, and needs better weathering and finished shortline-style ballast.  And in fact, since this photo was taken, I have added several layers to the area at right.  What is seen here, though, are cliffs made from aged locust tree logs, accented with polyfiber ground covering from Woodland Scenics.  Future additions include highlights with leaf particles from Noch, as well as some paints to add variety.  The trees here are commercially-made, and soon will be joined by handmade trees.  Like most northeastern layouts, I will need many many more trees!

Comments are always appreciated - feel free to comment here or drop me an email.  I want the scenery to be as effective at setting the locale as the signals are.

Best wishes for a safe, happy Labor Day weekend!
~RGDave

Thursday, July 31, 2014

Some Video of the Latest Operating Session

Just a quick post tonight to share a few impromptu videos from a recent operating session - these capture a slice of the experience we have every month or two when on an evening, 8 to 12 model railroad operators converge on the Onondaga Cutoff and run it like a railroad.

Here, SEBU is finishing a setout and pickup at Onondaga Yard and is shoving back to put their train back together while TV-7, a fast Boston-to-Chicago piggyback train, comes around him on Track 2.


We take it seriously enough to keep things organized, but the point is and will continue to be having fun, while trying hard to capture the experience of mainline railroading using actual schedules, scale models, and Conrail and NORAC operating rules.  Here, train BRSE from Chicago to Selkirk comes east through CP282, passing the signal crews who are out removing the old manual signals in the interlocking.  The train is led by a pair of run-through locomotives borrowed from the AT&SF Railway.


Excuse the poor quality of the videos - I think the sound and sight of the experience is worth sharing!

~RGDave

Monday, July 21, 2014

Playing with Scenery

Scenery is the last big frontier for the Onondaga Cutoff.  While there are some expansions planned here and there, most of the trackwork is complete, and we have worked the bugs out of it.  The CTC signal system is functionally complete although we are tweaking it here and there.  As these major initiatives wind down to basic maintenance, it is - finally - time to put some serious thought and effort into permanent scenery.  This will include not only trees and landforms but also structures and, eventually, people.

Recently I ripped out the temporary foam surface along the M&E at Skaneateles Creek, replacing it with a first stab at modeling rock faces and the edge of the forest.  I need to work on blending the 3-dimensional scenery into the 2-dimensional backdrop, but when viewed along the tracks, this is a marked improvement to bare plywood and pink foam 'cliffs' - the lighting reminds me of humid summer afternoons along the tracks:


Modeling Central New York terrain and rocks means finding a way to represent the undulating, sedimentary rock that is so prevalent in that area of the country.  Once that is glued in place, we go back and add ground foam and trees to represent a forest.  The M&E wanders through the woods between Euclid and Onondaga, and I hope that operators can feel like they are in the woods with it!


The other extreme is the industrial landscape at Onondaga Yard, especially at night.  Here B23-7 1987 and a clean CN GP40-2L(w) 9549 share the fuel pad, long after dark on a humid July 21, 1994.

There's some exciting features being added to the signal system, too - namely, modeling the approach-lit signals so common throughout the Chicago Line.  These signals are only lit when a train is in the block facing the signal, so as to save power and light-bulb life.  Thanks to the CATS software, we can add this feature to the hardware already installed with some LOGIX computer programming that runs on top of JMRI and CATS during an operating session.  More on this soon!

Enjoy the long summer days!

~RGDave

Monday, June 30, 2014

More Locomotive Upgrades

As we settle in to the newly-completed signal system, testing all the aspects under regular traffic, I have turned back to the mechanical side of things.  I have a drawer full of models that I completed more than 10 years ago that were wired up for conventional DC control, and all of these are eventually going to be updated to modern DCC control and working headlights.  


Here's a 'night shot' of the latest unit to be upgraded with a working LED headlight and a DCC decoder, as well as new nickel-plated wheels - CSXT 6126, a GP40-2 I superdetailed in 1998.  A nice bonus is that the Athearn cab allows headlight glow to reach the numberboards, and when those are painted white, you get the bonus of lit numberboards!

As summer sets in, time for the layout is more limited, but progress will continue - one step at a time.

~RGDave

Thursday, June 12, 2014

Finally, More Fascia!

Now that the signal system is complete (it still makes me smile to write that!), the vast majority of the wiring is now complete on the railroad, which will allow me to move ahead with the long process of adding scenery to the layout.  For me, the first step in that process is adding the fascia panel boards on the front edge of the railroad.

First, a quick iPhone snapshot of a late-running TV80, coming east in morning light at CP282, under the recently installed signal bridge which is also displaying approach-medium for a westbound:


If I take a few steps away from the layout, this is the overview of that same area, with the new fascia panels hung and the edge of the Yardmaster's 'Office' at the lower right:

The fascia is cut from 4'X8' sheets of simple 1/4" 'Masonite' hardboard, a wood product available at most home-supply stores and lumber yards.  It's flexible and smooth when curved in plane, but provides a nice hard surface once it is edge-mounted on the benchwork.  This will be primed and painted a darker color once scenery is further along so as to be less distracting, but even with the unpainted surface I think it lends a much more finished look to the areas where it is installed.  It forms a nice, definite edge to the railroad, which helps me visualize and construct the terrain.

Scenery will be a learning experience for me, as I have only very limited history with scenery construction.  I will share that process here!

~RGDave


Wednesday, May 28, 2014

CTC is now....C O M P L E T E

May 28, 2014, will always be remembered as an important date on the Onondaga Cutoff - the date that the CTC was completed on the main line of the railroad!  Thanks to immeasurable assistance from Nick and consulting from Jack, CP282 entered service today and the results are something I am pleased with.  Especially the long-awaited signal bridge for the westbound home signals at CP282:


Appropriately, the signal department installed black bags on the signal heads of the old manual signals so as not to confuse crews approaching CP282.  At a future operating session, a work train will be assembled to come out and remove the signals; until then, we can see past and present at the same time.  Scenery will improve the look of these locations, and now that the signals are installed and working, it's time to start scenery in earnest.


From now on, the Mohawk Dispatcher will be able to see and authorize all movements on main tracks on the entire railroad.  The signals here are all linked to each other and block detection via the computer, just as the rest have been, and so the main track on the entire railroad is now dispatcher controlled.

I must admit this is a milestone that ranks near the top of anything I have ever accomplished in this hobby - it is something I have dreamed of for more than 25 years.  Prototype operation of this railroad requires a working signal system, and now, we have it!

~RGDave


Tuesday, May 20, 2014

Ballast and Interlockings

As I continue to install some ballast along the main tracks of the Onondaga Cutoff, I am getting better at the painstaking process required when ballasting a turnout.  With small moving parts that are subject to very tight clearances, this process is difficult at best - care must be taken, as there is a good possibility that a turnout can be ruined!


Here we see some of the basic tools used in the process:  ballast, diluted white glue, isopropyl alcohol, water, and a soft brush.  While I use a large brush for most of the ballasting, the details inherent around a turnout - the frog, and points, specifically - require a smaller brush to ensure that all the granules of ballast are properly set between the ties and away from any moving parts.  This shot is at CP280, and I only ballasted the main tracks as part of this process.  But it still took me about 5 hours of work!  As we've discussed here before, every small step matters, and the persistence and patience are as much of a lesson as they are a tool.

Once the ballast is in place, I install tape over the moving end of the points to prevent glue from hitting those areas.  I also brace the points 'halfway' thrown so as to avoid gluing points shut.  The final preparation is to cover adjacent areas with paper towels, and then proceed to mist the entire freshly ballasted area with the alcohol.  Once it is wet, I dribble the diluted glue (with some alcohol mixed in already) over the areas, soaking the new ballast until you can see the white glue beginning to puddle up.  At that point, I use a damp cloth to wipe the rail heads down.  The next morning, it looks like this:


Once nice thing about the actual ballast installation process is that it yields an almost finished product right away - it's a major visual impact, and only requires a bit of weathering to become the finished piece.  Here with see the #1 crossover at CP280, ready for service.

Signal updates are forthcoming - I received word that the long-awaited final signal bridge shipped this morning.  Exciting progress coming soon!

~RGDave


Monday, May 12, 2014

A Bit of Ballast

Just a quick photo for you all of some track that has finally received ballast - this has been a long time coming, and is a first big step towards scenery construction:


This location is the curve between CP282 and CP280, with weathered Micro-Engineering flex track and HO scale ballast by Arizona Rock & Mineral Company.  As I get more experience I think this look will improve, and I think it will be an effective representation for the main line track.

The final signal bridge, also long awaited, is reported to be shipping this week.  Stay tuned!

~RGDave


Wednesday, April 23, 2014

Steady Progress

Operations on the Onondaga Cutoff continue to develop, and remain one of my favorite parts of the whole railroad hobby these days.  Interchange between different jobs and railroads is an integral part of that, and so we include not only Conrail jobs but also jobs of the NYS&W, and M&E, in each of our sessions.

Here, NYS&W job SY-1 moves light power through CP280, at the east end of Onondaga Yard.

 Weathering track ahead of ballast installation is a big process and as you can see above, is coming along well.  Much of the progress on a model railroad is just slow, steady persistence, working towards the end goal of a finished layout.  And, in that idea lies one of the more hidden attributes of our hobby:  coaching.  I say this in mind of how the process of building such a creation takes years, if not decades, to complete.  How many hobbies today demand such patience and persistence?   This layout is 'coaching' me to be more patient, to relax and enjoy the process.  For example, due to supplier issues, I am still awaiting the delivery of the final signal bridge, which in turn delays the process of installing the ones I have on hand.  It's frustrating, but on the other hand, there's lots to do to keep progress moving.

One bridge that we do have on hand now is the bridge to support the intermediate signals at MP 278.  Here's that bridge, ready for installation, complete with number plates I built using decals with the correct Conrail font:

I love how these turned out; Tim at Integrated Signal Systems did a masterful job with the soldering and included details that really make the bridge a special piece:  ladders, NYC-style targets, and different finials (the top cap on the masts) per the prototype.  This bridge will be lit the same day as all the remaining signals.

Slow, steady progress is how you get to the destination - and also how I enjoy the process.

~RGDave

Monday, March 31, 2014

Night Shots

The regularity of hosting operating sessions has, as I have written about before, led to a host of developments on the Onondaga Cutoff.  One of those has been the installation of a 'fast clock' which works with the DCC software to display a time that we use for operation.  In order to more effectively manage the compressed distances represented on a main line in modeling, we selected a ratio of 3:1 for the fast clock, so each real minute contains 3 'model' minutes.  This is the clock we use exclusively for operating sessions.

As a result, we have 'night' on the layout, and thanks to the installation of some lighting, we also have now the possibility of night shots.


Here we have Conrail B23-7 no. 1971 resting on the fuel pad at Onondaga Engine terminal under my models of fluorescent yard lights, ahead of this past weekend's operating session.  The engine house inside has my models of sodium-vapor shop lights, and I like the different hues they provide.  The room lighting that I installed years ago, halogen incandescent track lighting, is dimmable, which allows an approximation of dawn and dusk as well.  This is just a quick photo with the iPhone to illustrate what I think may become my favorite style of model photo!  

Modeling an around-the-clock freight operation adds a sense of place and mission to the Onondaga Cutoff.  That will only get better with more layout lighting and with scenery!

~RGDave


Wednesday, March 5, 2014

More Collaboration

In several blog entries over the last few years, I have mentioned a growing notion that the Onondaga Cutoff is becoming a community-oriented model railroad.  While it is located at my home, the contributions of several guys have been critical in bringing the operation to life, whether that be in signal design, signal construction, operation planning, and the addition of details to many scenes.  A big THANKS is in order for all that have pitched in!  The layout has really matured quite a bit in a few years.

Here's a photo of another recent collaborative process - Mark, a longtime friend and fellow operator and modeler who casts models of truck cabs out of resin, has built and supplied a Conrail knuckle-boom truck for the maintenance-of-way fleet on the Onondaga Cutoff, in exchange for airbrush-weathering services on some of the cars in his fleet.  Here the Car Department works on a bad-order hopper car, set off at Onondaga Yard:


We figured out a rough estimate for each service, and are simply trading services, each of us doing for the other what would take an entire learning process.  All I will do to this model is to add window glass and a painted interior.  While scratchbuilding trucks for the whole layout would be enjoyable, on a large layout there are tradeoffs to be made.  The time spent learning to produce a model like this was instead spend weathering models for Mark, plus weathering track and installing signal system components.  It's a win-win for us both.

Relying on collaboration - a 'little help from my friends' - is the only way a large layout like this will approach a finished state in any reasonable amount of time, and along the way, we're having a great time!

~RGDave  

Wednesday, February 26, 2014

Lights, Sound...

...and ACTION, I believe the saying goes!

As the signal process moves towards completion, I continue to squeeze in other projects as time allows.  One of the most recent was adding sound to another locomotive, which always adds a lot to the feel of the operating sessions.

Here's a video for your enjoyment, as I have just upgraded a second SD60I to have sound, bringing my total up to 8 units.  More will follow.  Both of the units featured here have SoundTraxx GN-1000 sound boards, with EMD 710 sounds.  This pair of units comes upgrade through CP-277, past some rudimentary scenery foundation.  They really sound excellent - make sure your speakers are turned up!


~RGDave

Thursday, January 30, 2014

Final Preparations

Yesterday's action on the model railroad:

The signal crews on the Onondaga Cutoff have been busy doing the preparation work for the final cut-in on the territory, which will be CP-282, the interlocking controlling the main line at the west end of Onondaga Yard.  The signal bridges themselves are under construction and have yet to be delivered, but the dwarf signals and masts are on-site and the crews are working to install all the boards and connections underground ahead of the cut-in.

Foreman Anshant is seen here with his crew on the South Runner, waiting for foul time on Track 1 to finalize an insulated joint.

Once the new signals are in place, the manual signals pictured here will be removed.  Local railfans are doing what they can to document the last of these, as they will all be gone here within the next few months.

And - in the same light - a small group of guys went to the prototype Chicago Line in Syracuse, NY, a few weeks back to document the last of the former NYC signals before they, too, are replaced this year.  Here's my image of CSX train Q384 about to knock down a medium approach aspect at CP-286 in East Syracuse, NY, as the snow falls heavily around us, with another eastbound train lined up on Track 2:


The remaining photos will be in my flickr account, some of which you can see now at this location.   More are added as time permits.  Stay tuned for photos of the final cut-in later this winter!

~RGDave

Wednesday, January 15, 2014

Weathering Track

On a model railroad, as on the prototype, track is a critical component.  Track on the Onondaga Cutoff was very carefully installed and requires regular maintenance in order to stay smooth.  For me, it follows that I treat track as a separate model, which means - like everything else on my layout - it must be appropriately weathered to better represent what we see on the prototype.

A few quick photos from the iPhone will help illustrate.  Here's a shot of CP282, an area that has yet to receive its final installation of signals, and as such it's an area that has yet to be fully weathered.  As a result, while the installation of track is sound and operates smoothly, the appearance is distracting and disjointed.


My procedure for weathering track involves masking all switch points and joints, as well as lineside details that I don't want to cover with paint at this point.  Once the masking is in place, I set up fans for ventilation, and apply an overspray of rail brown from Floquil.  I immediately wipe down each rail head with a rag soaked with paint thinner, and then remove the masking.  Once the overspray cures for a few minutes, I can go back with a BrightBoy abrasive cleaning block to polish the rail heads.  Finally, I go back and hand-paint some of the ties different shades of brown to suggest ties of different ages.  Here's the result, recently completed at CP277.  Ballast will tone down the uniform look of the roadbed, but the ties and rail will remain.


I think it's a dramatic improvement, and it's even more evident in person, seeing the change all at once.  CP277 will receive ballast soon too, which will again improve the appearance dramatically.  

Finally, a shot of some light power coming west through CP277, to give you a sense of how the new weathered track looks with clean Conrail blue:


Thanks as always for your viewing and comments!  Upcoming projects include several new additions to the locomotive fleet, and also the big conclusion of the signal system installation:  an intermediate bridge at MP 278, and all the signals at CP282.  It's a total of 30 heads, which is a lot of work, but the finish line draws closer and closer!  

~RGDave